

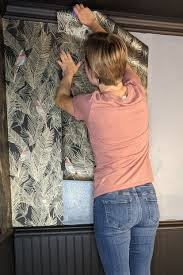
When it comes to decorating your home, removable wallpaper is a fantastic choice for those who want to change up their style without committing to something permanent. It’s especially ideal for renters or anyone who wants the flexibility to update their interior design frequently. However, the success of your removable wallpaper installation largely depends on how well you prep your walls beforehand. In this comprehensive guide, we’ll walk you through the necessary steps to ensure your walls are properly prepared, guaranteeing a smooth and long-lasting application.
Why Prepping Your Walls is Crucial
Prepping your walls is one of the most important steps in ensuring your removable wallpaper adheres well and looks professional. When walls are clean, smooth, and dry, the wallpaper will stick better and be less likely to peel over time. If you skip this crucial step, you might face problems like bubbles, wrinkles, and uneven edges, which will ruin the aesthetic you're trying to achieve.
Benefits of Proper Wall Prep:
- Better Adhesion: Clean and smooth surfaces allow for stronger bond formation between the wallpaper and the wall.
- Longer-Lasting Results: Properly prepped walls ensure that the wallpaper will stay in place for longer without issues like peeling or lifting.
- Smoother Finish: A well-prepped surface will make your wallpaper look seamless and professionally applied.
- Easy Removal: Prepping the wall properly allows you to remove the wallpaper without damaging the underlying paint or drywall.
With that in mind, let's dive into the specific steps you need to take to prep your walls.
Step 1: Clean Your Walls Thoroughly
The first step in wall preparation is to clean the surface. Dust, grease, and dirt can cause wallpaper adhesive to fail, leading to peeling or air bubbles. Before applying removable wallpaper, you need to make sure your walls are spotless.
Tools You’ll Need:
- Mild soap or wall cleaner
- Water
- Sponge or microfiber cloth
- Drop cloth or old towel
How to Clean Your Walls:
- Dust the Walls: Start by removing any dust or cobwebs from the wall. Use a duster, microfiber cloth, or vacuum with a soft brush attachment.
- Clean the Surface: Mix mild soap with water to create a gentle cleaning solution. Dampen a sponge or cloth and gently wipe down the walls. Be careful not to soak the walls, as excess moisture can damage drywall.
- Target Stubborn Stains: For grease or stains, use a wall cleaner or a mixture of baking soda and water. Scrub the affected area until the stain is gone.
- Dry the Wall: After cleaning, wipe the walls with a dry cloth to remove excess moisture and let them air dry completely.
If your walls are painted with a glossy finish, consider using a degreaser to remove any oily residue that could interfere with wallpaper adhesion.
Step 2: Repair Any Imperfections
Once the walls are clean, it’s time to inspect them for any imperfections. These can include cracks, holes, dents, or peeling paint. If you skip this step, imperfections may become more noticeable once the wallpaper is applied.
Tools You’ll Need:
- Spackle or joint compound
- Putty knife
- Sandpaper or sanding block
- Primer (optional)
How to Repair Wall Imperfections:
- Fill Holes and Cracks: If your walls have any holes, cracks, or dents, apply spackle or joint compound with a putty knife. Smooth it out so that it is level with the surrounding wall.
- Sand the Surface: Once the spackle has dried (usually within a few hours), use fine-grit sandpaper to smooth the surface. Sanding ensures the patched areas blend seamlessly with the rest of the wall.
- Prime if Necessary: If you’ve applied joint compound or spackle, you might want to apply a coat of primer to seal the repaired areas. This helps prevent the wallpaper from peeling and ensures a uniform finish.
Step 3: Smooth Out the Wall Surface
The smoother the surface, the better the wallpaper will adhere. If your walls are textured, such as with a popcorn finish or heavy knockdown texture, you may need to consider smoothing them out before applying removable wallpaper.
Tools You’ll Need:
- Sandpaper or a sanding block
- Primer (optional)
How to Smooth Out the Wall:
- Assess the Texture: If your walls have a slight texture, you may be able to proceed without smoothing them. However, heavy textures can cause issues with wallpaper adhesion.
- Sand the Walls: For minor texturing, lightly sand the walls with fine-grit sandpaper. This will help to smooth out the surface without causing damage to the drywall.
- Apply a Coat of Primer: If the texture is still noticeable after sanding, you may need to apply a coat of primer to even out the surface. This is particularly important for walls that have been patched or repaired.
Step 4: Ensure Your Walls Are Dry
After cleaning, repairing, and smoothing the surface, it's essential to make sure your walls are completely dry before applying the wallpaper. If there is any moisture present, the wallpaper’s adhesive will not stick properly and could cause damage.
How to Ensure Dryness:
- Wait for the Walls to Dry: Allow ample time for the walls to dry after cleaning, repairing, and sanding. This usually takes a few hours or longer, depending on the humidity and airflow in the room.
- Test for Moisture: If you’re unsure whether the walls are fully dry, press a piece of masking tape onto the surface and remove it. If any moisture is present, the tape may not come off easily or could tear.
Step 5: Remove Old Wallpaper or Residue
If you’re installing removable wallpaper over an existing wallpaper, it's important to remove the old wallpaper and any adhesive residue first. Failing to do so could result in poor adhesion and may cause the wallpaper to peel off.
Tools You’ll Need:
- Wallpaper scraper
- Wallpaper adhesive remover
- Sponge or cloth
How to Remove Old Wallpaper:
- Peel Off the Wallpaper: Start by gently peeling the old wallpaper off the wall. Use a wallpaper scraper or putty knife to lift the edges.
- Use Wallpaper Adhesive Remover: If any adhesive remains on the wall, apply a wallpaper adhesive remover. Allow it to sit for the recommended amount of time, then scrape away the residue.
- Clean the Wall: After all the old wallpaper and adhesive are gone, clean the wall with mild soap and water, and allow it to dry completely.
Step 6: Prime the Walls (Optional)
Priming the walls can provide an extra layer of protection and help ensure the wallpaper adheres more evenly, especially on porous surfaces. It’s especially important if your walls are highly textured or if you’ve recently patched them.
How to Prime the Walls:
- Choose the Right Primer: Use a primer designed for your specific wall surface, whether it’s drywall, plaster, or painted walls. For most removable wallpaper, a basic bonding primer works well.
- Apply the Primer: Using a roller or brush, apply a thin coat of primer over the entire wall. Allow it to dry completely before moving on to wallpaper application.
Step 7: Measure and Plan
Before you begin installing the removable wallpaper, take a moment to plan out the design. Properly measuring the space and planning the wallpaper layout is key to achieving a professional look.
How to Plan:
- Measure the Wall: Measure the height and width of the wall to determine how much wallpaper you’ll need. Remember to allow extra for pattern matching and trimming.
- Dry Fit the Wallpaper: Lay out a strip of wallpaper on the wall without removing the backing to see how the pattern aligns. This will help you adjust the placement before you fully stick it down.
- Mark Your Starting Point: Choose a starting point that’s near the center of the wall to create a symmetrical design. Use a pencil and a level to draw a vertical line as your reference guide.
Final Thoughts
Properly prepping your walls before applying removable wallpaper is essential to ensure that your wallpaper adheres correctly and looks flawless. By following these simple steps—cleaning, repairing, smoothing, ensuring dryness, and priming—you’ll create the perfect foundation for a beautiful, long-lasting wallpaper design. Whether you’re a DIY enthusiast or a first-timer, these steps will help you achieve professional results and transform your space into something you can be proud of.
Remember, taking the time to prep your walls thoroughly will pay off in the end. Happy decorating!


0 Comments